Let’s get your new solar meshtastic node up and running!
Hardware Setup
-
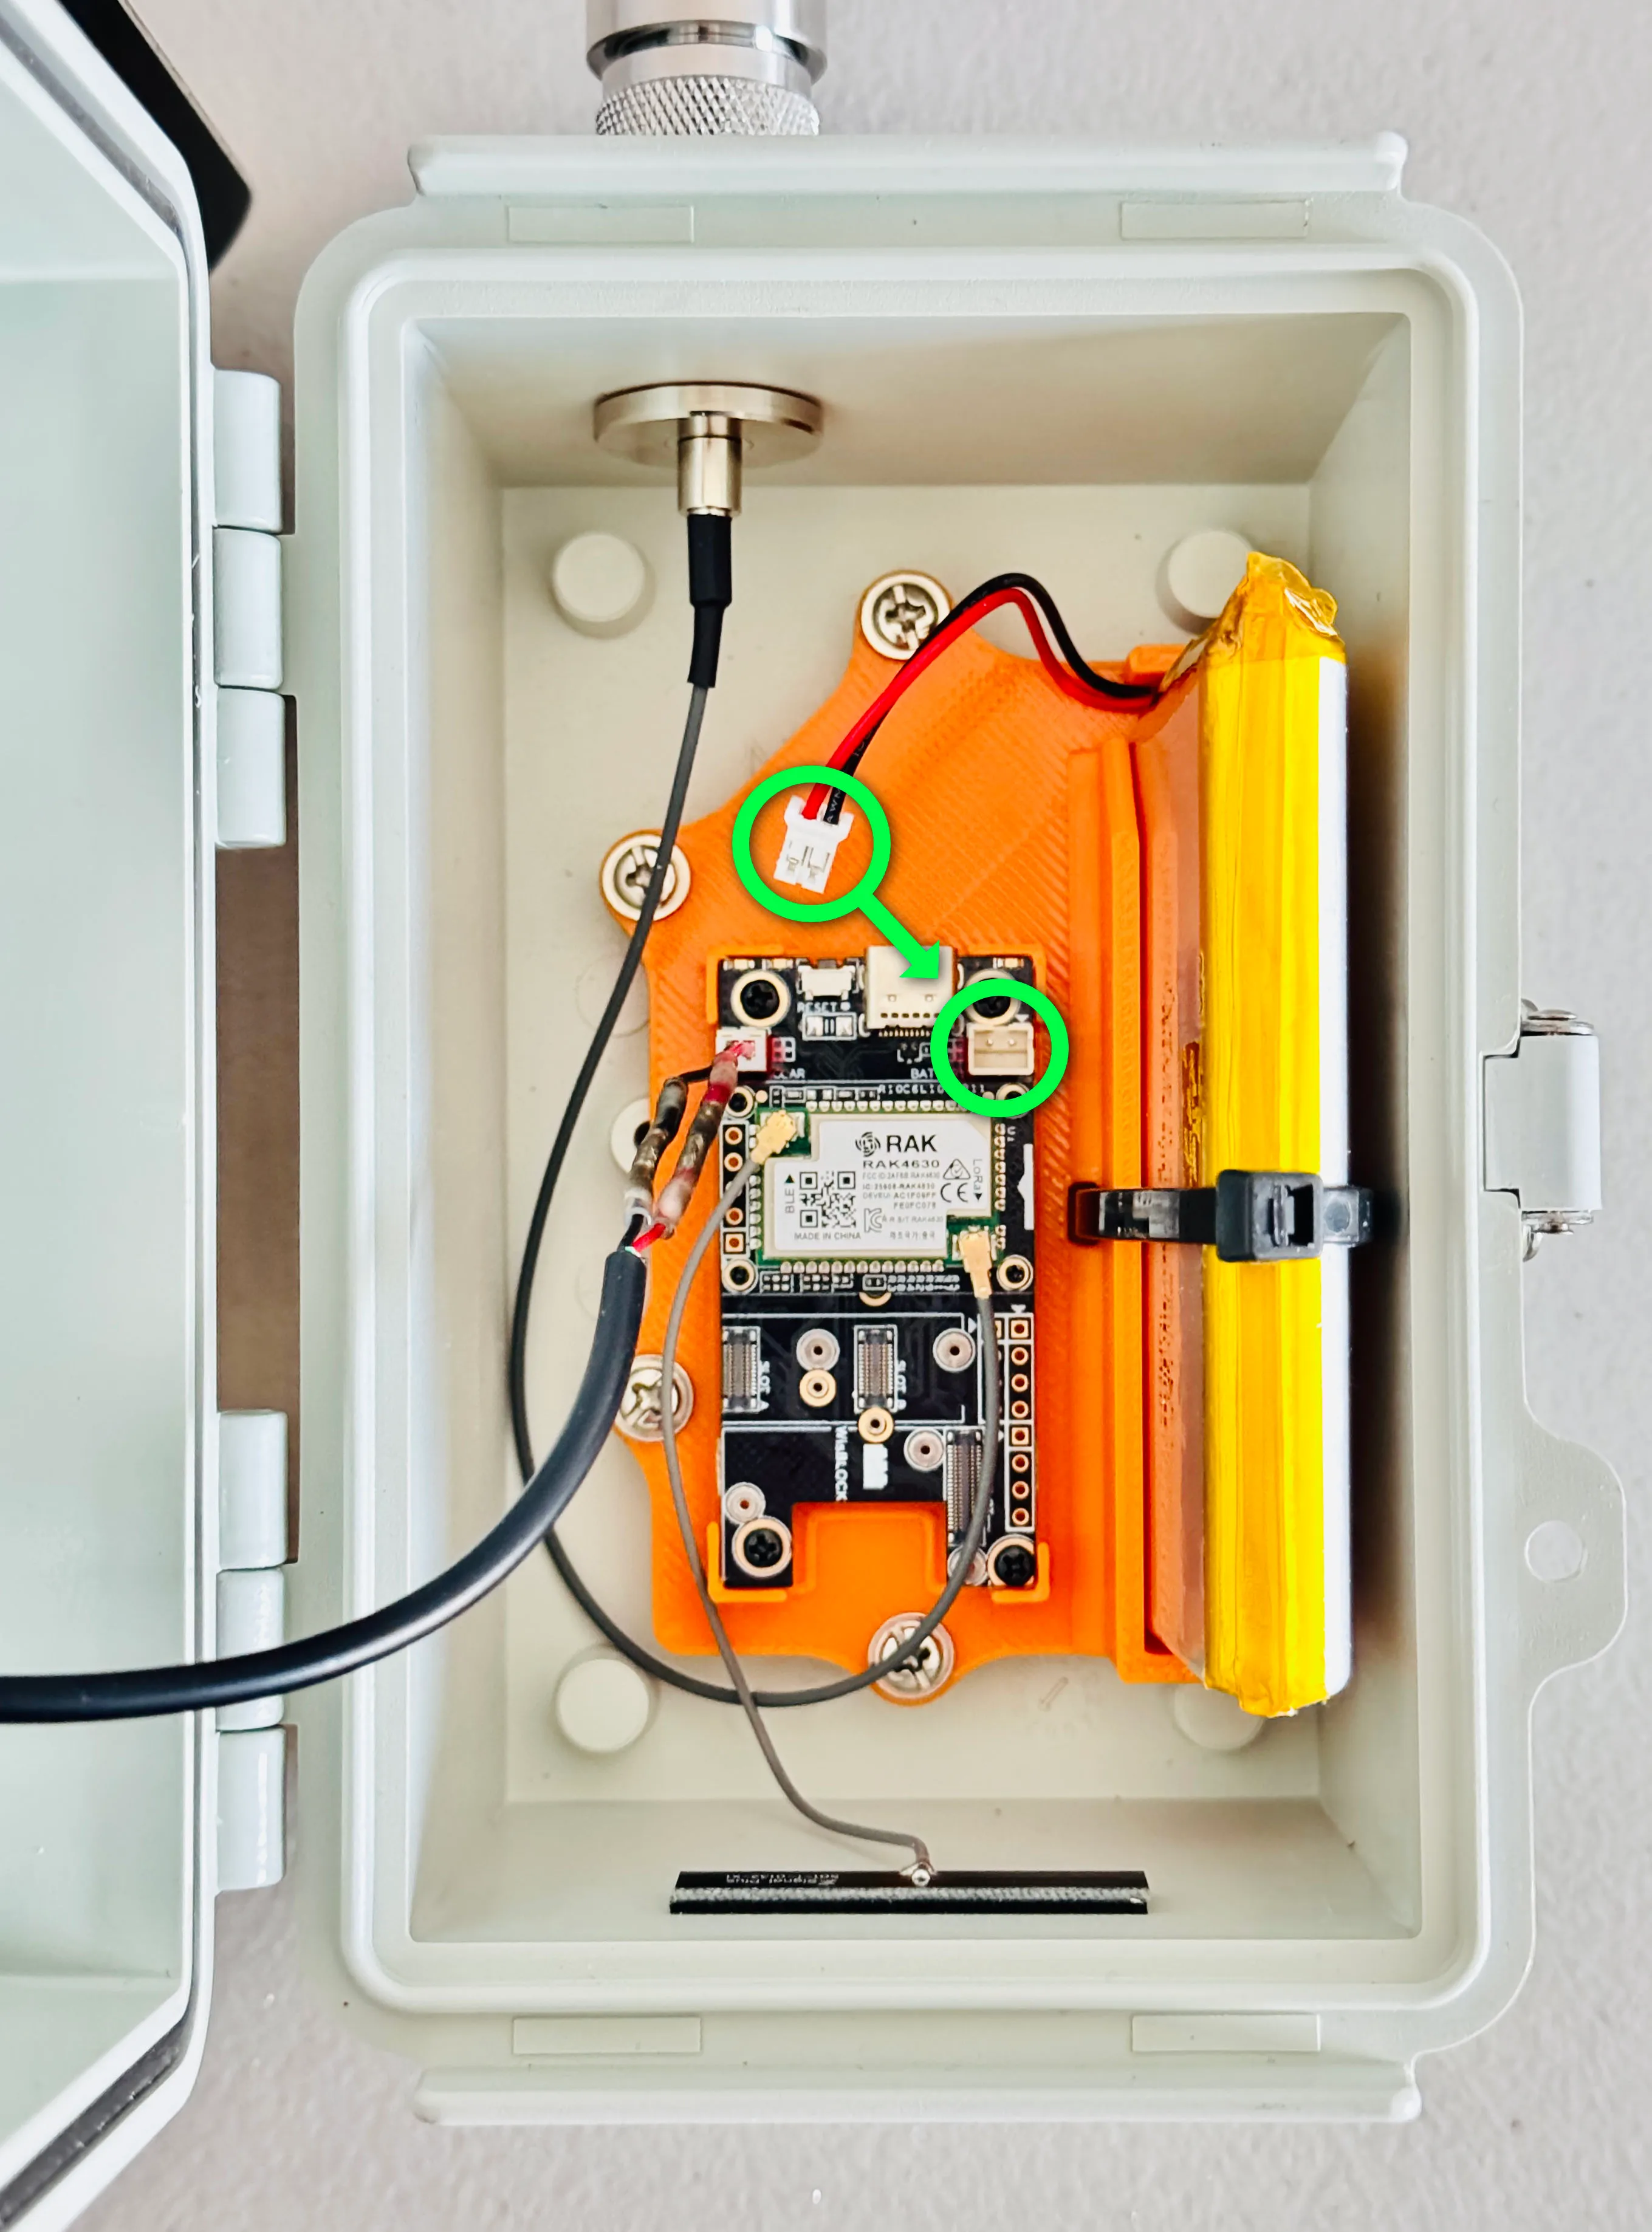
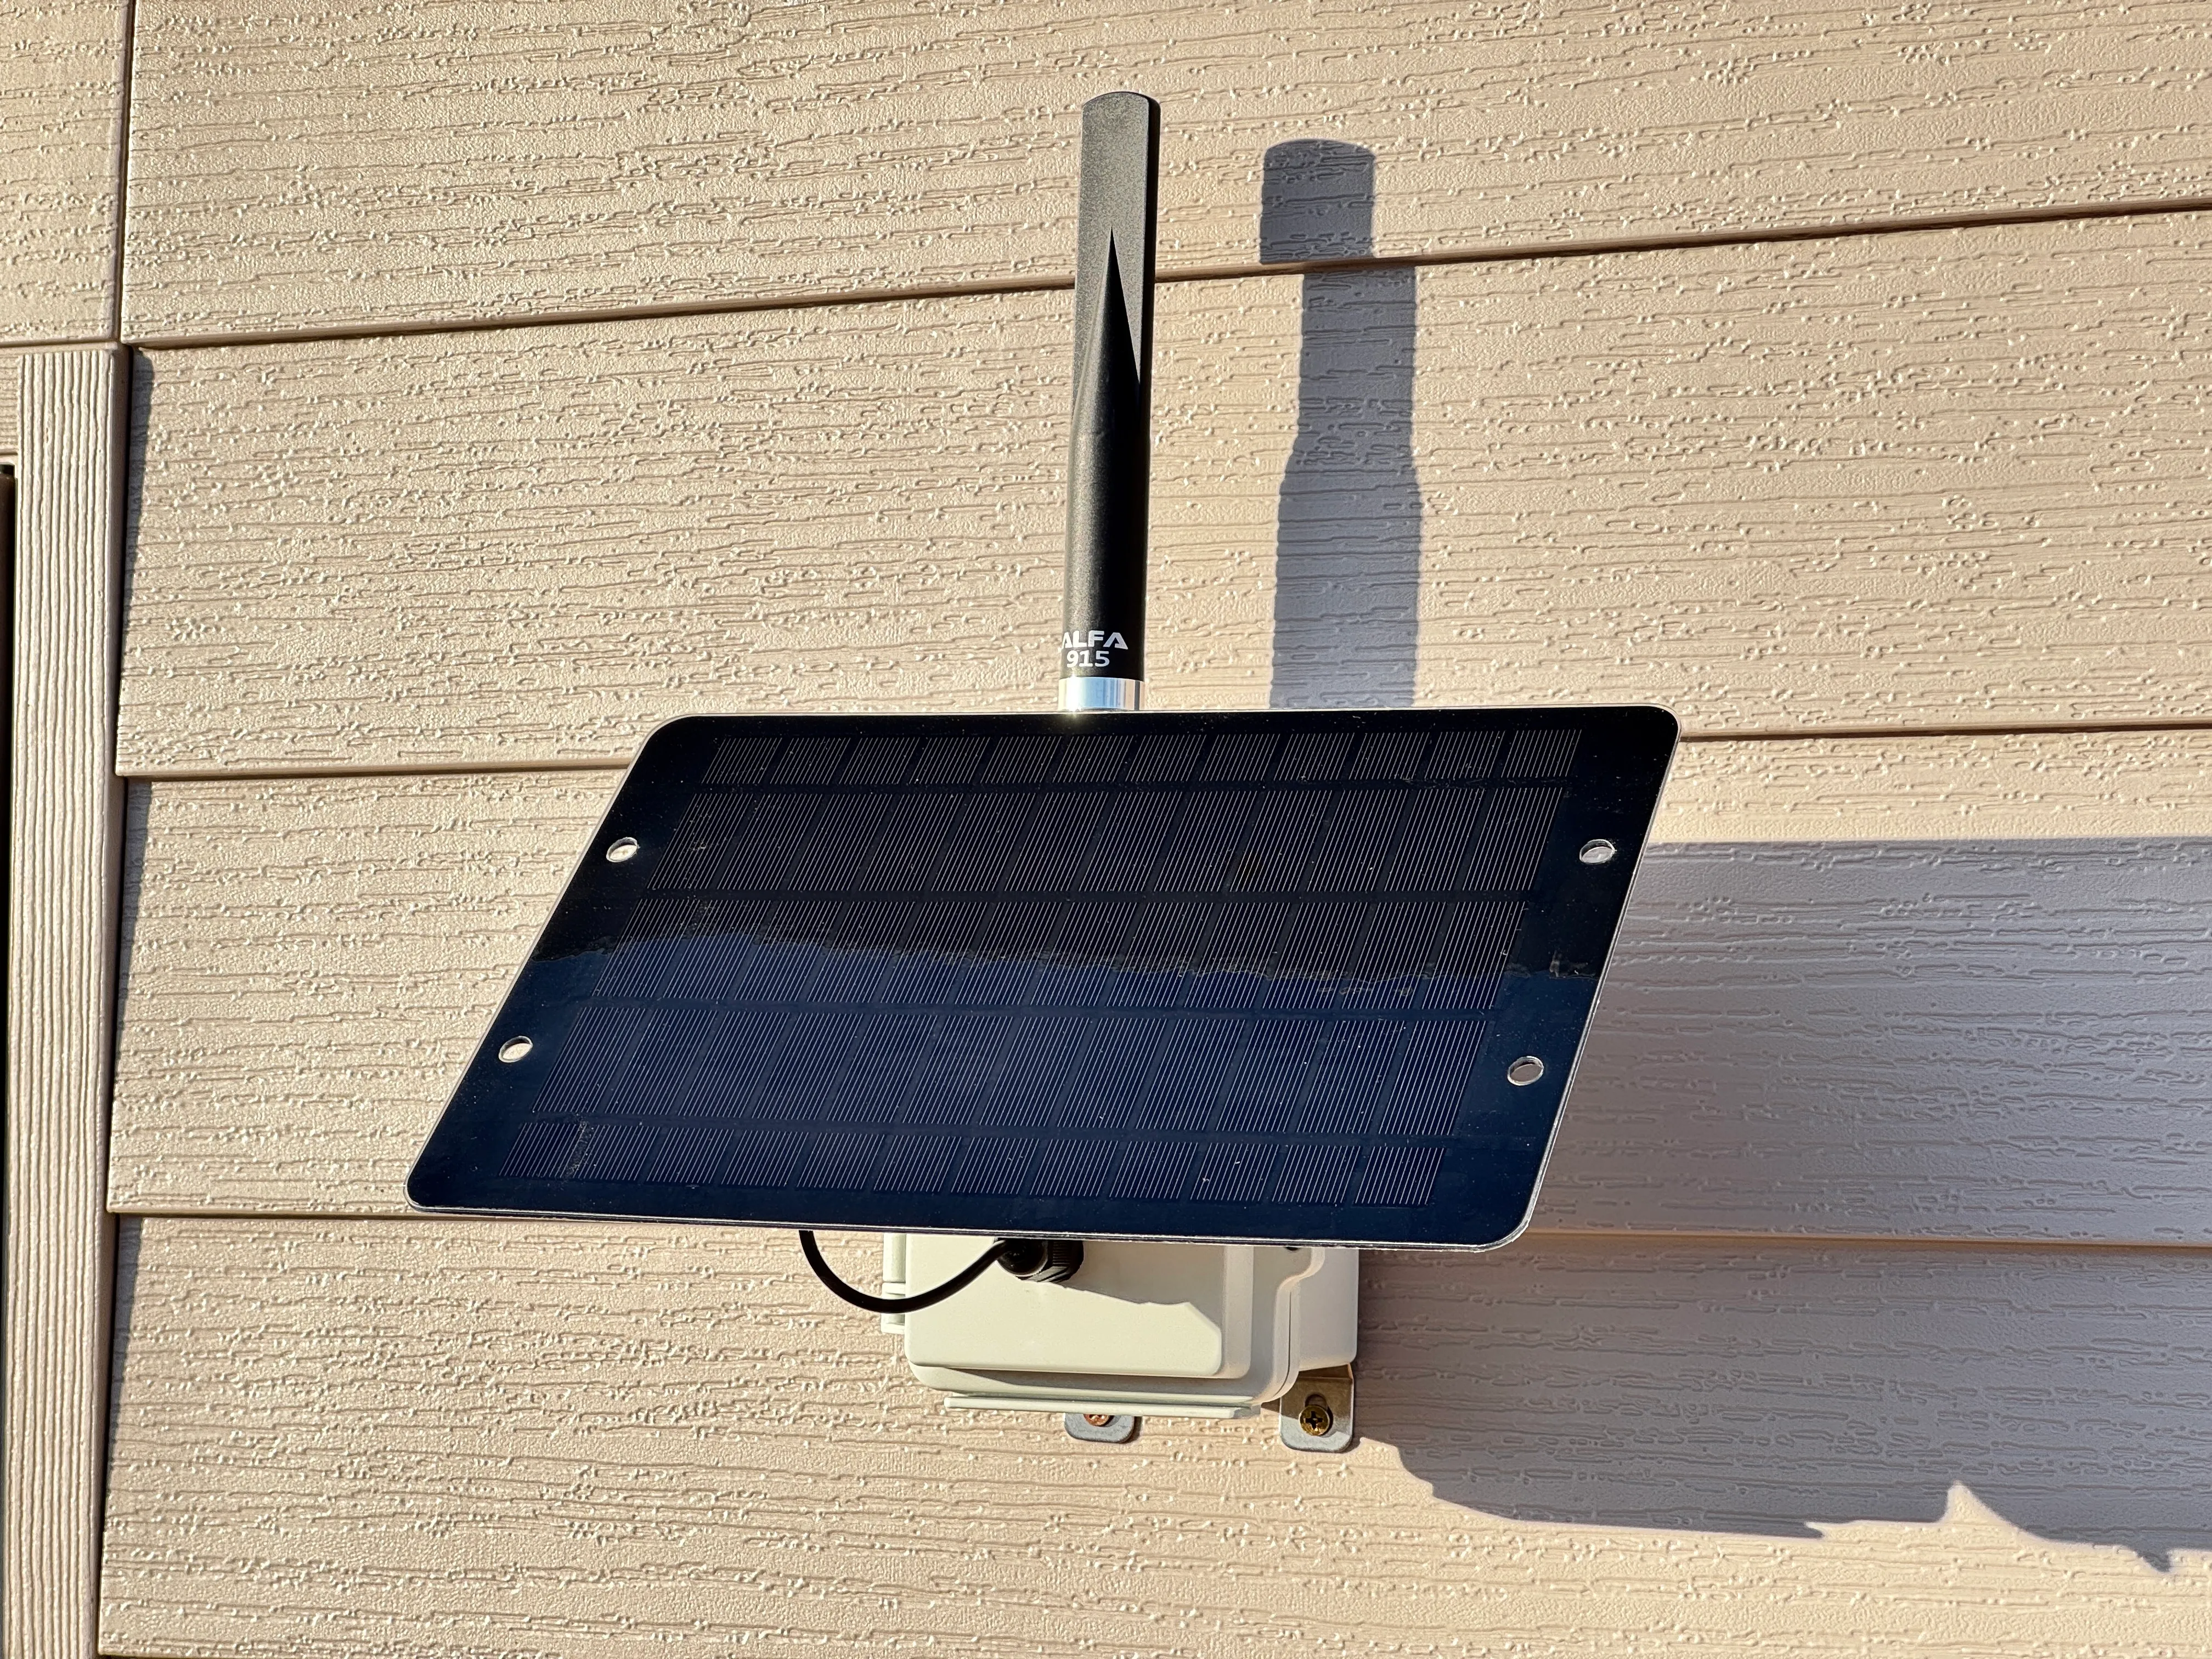
Attach antenna to mount on top of enclosure. Be careful to always connect antenna before powering on the device or it can damage the electronics on the board.
-
Open enclosure and connect battery cable to JST connector on board. Make sure it is plugged in with the red (+) wire on the left side.
- Download the Meshtastic app on iOS or Android.

Steps below show screens from the iOS app. The Android has equivalent functionality but a slightly different UI.
Radio Configuration
-
Open the Meshtastic app.
-
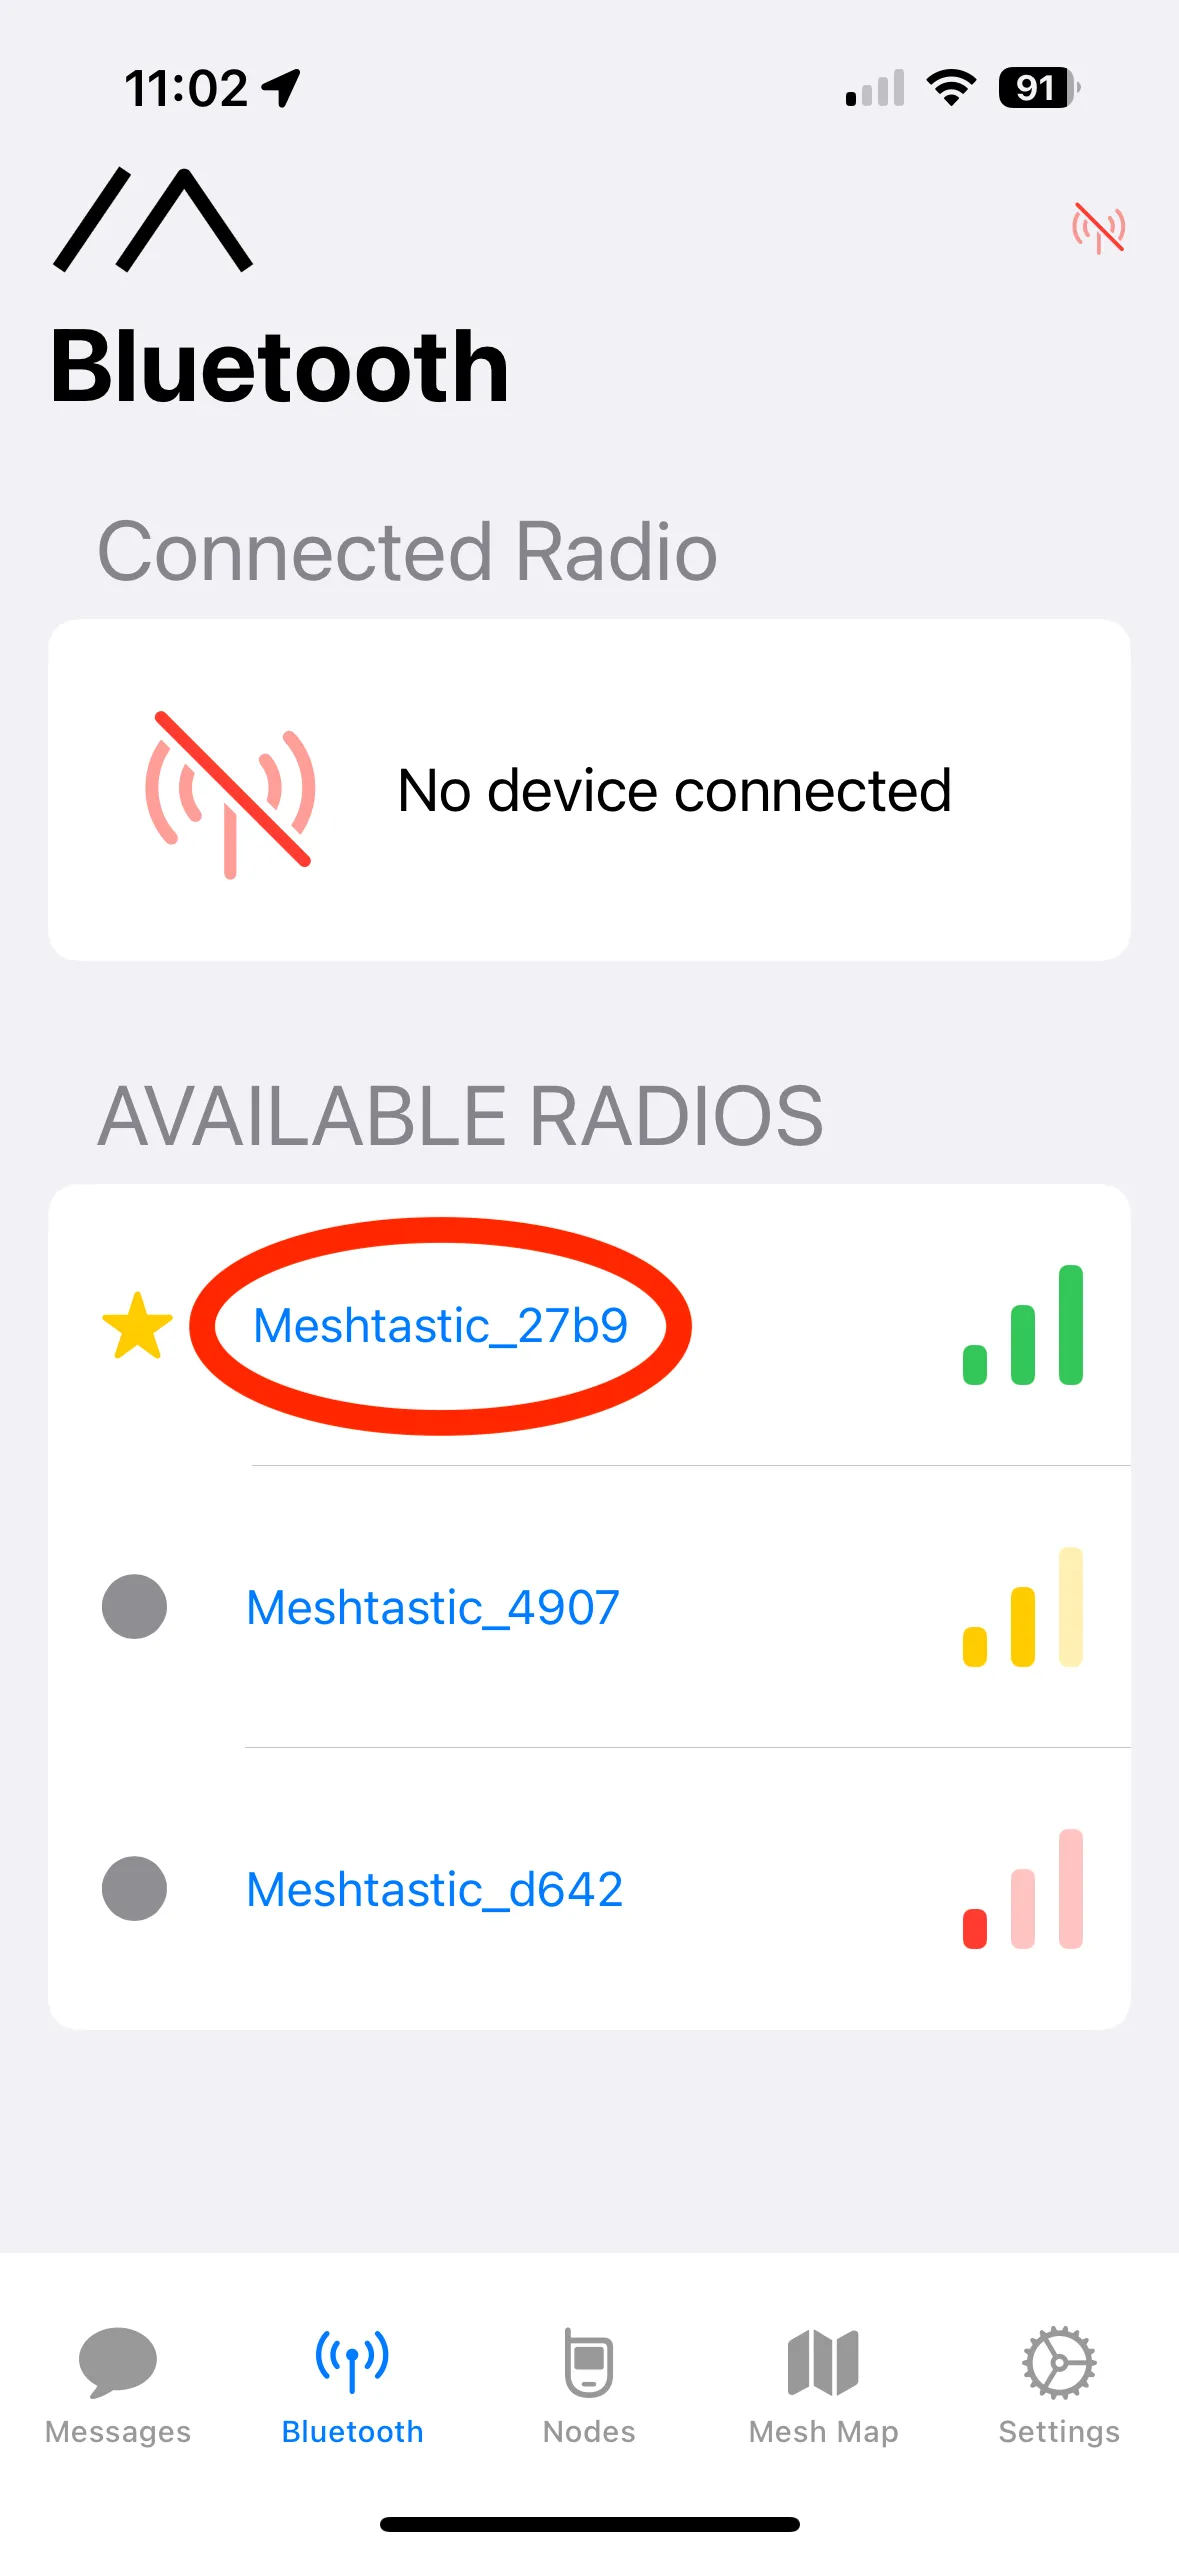
In the Bluetooth tab, tap on the radio that matches the 4 digit code printed on the bottom of the radio enclosure.
- The first time you connect to the radio, you have to pair it with your phone. Enter the default pairing code of:
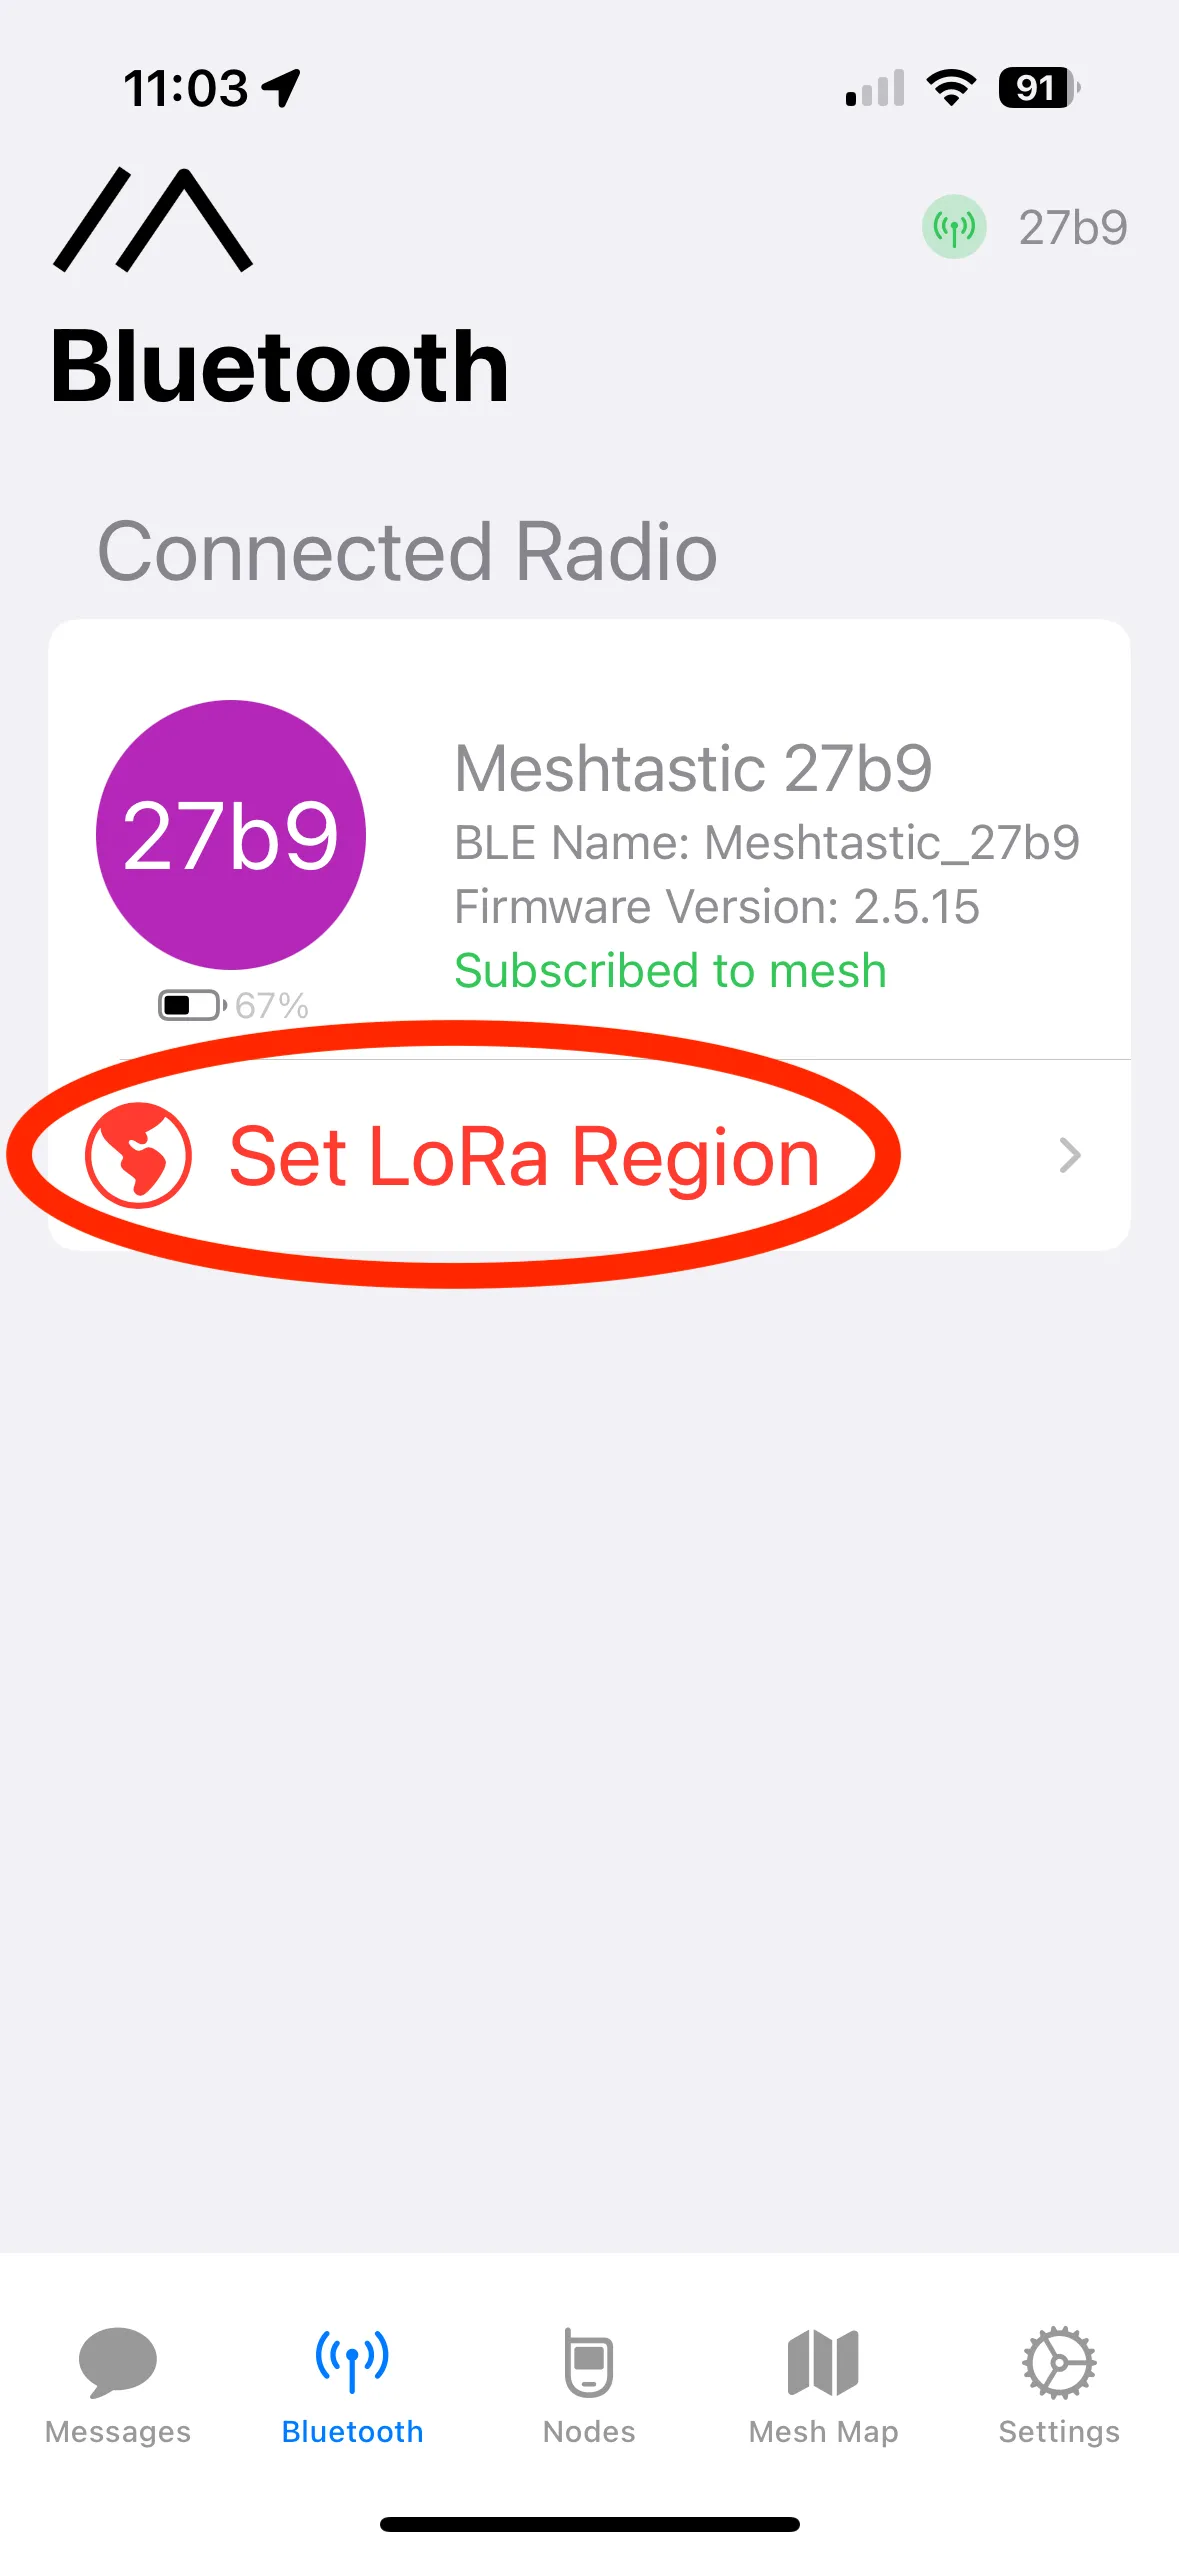
123456- Click on “Set LoRa Region”
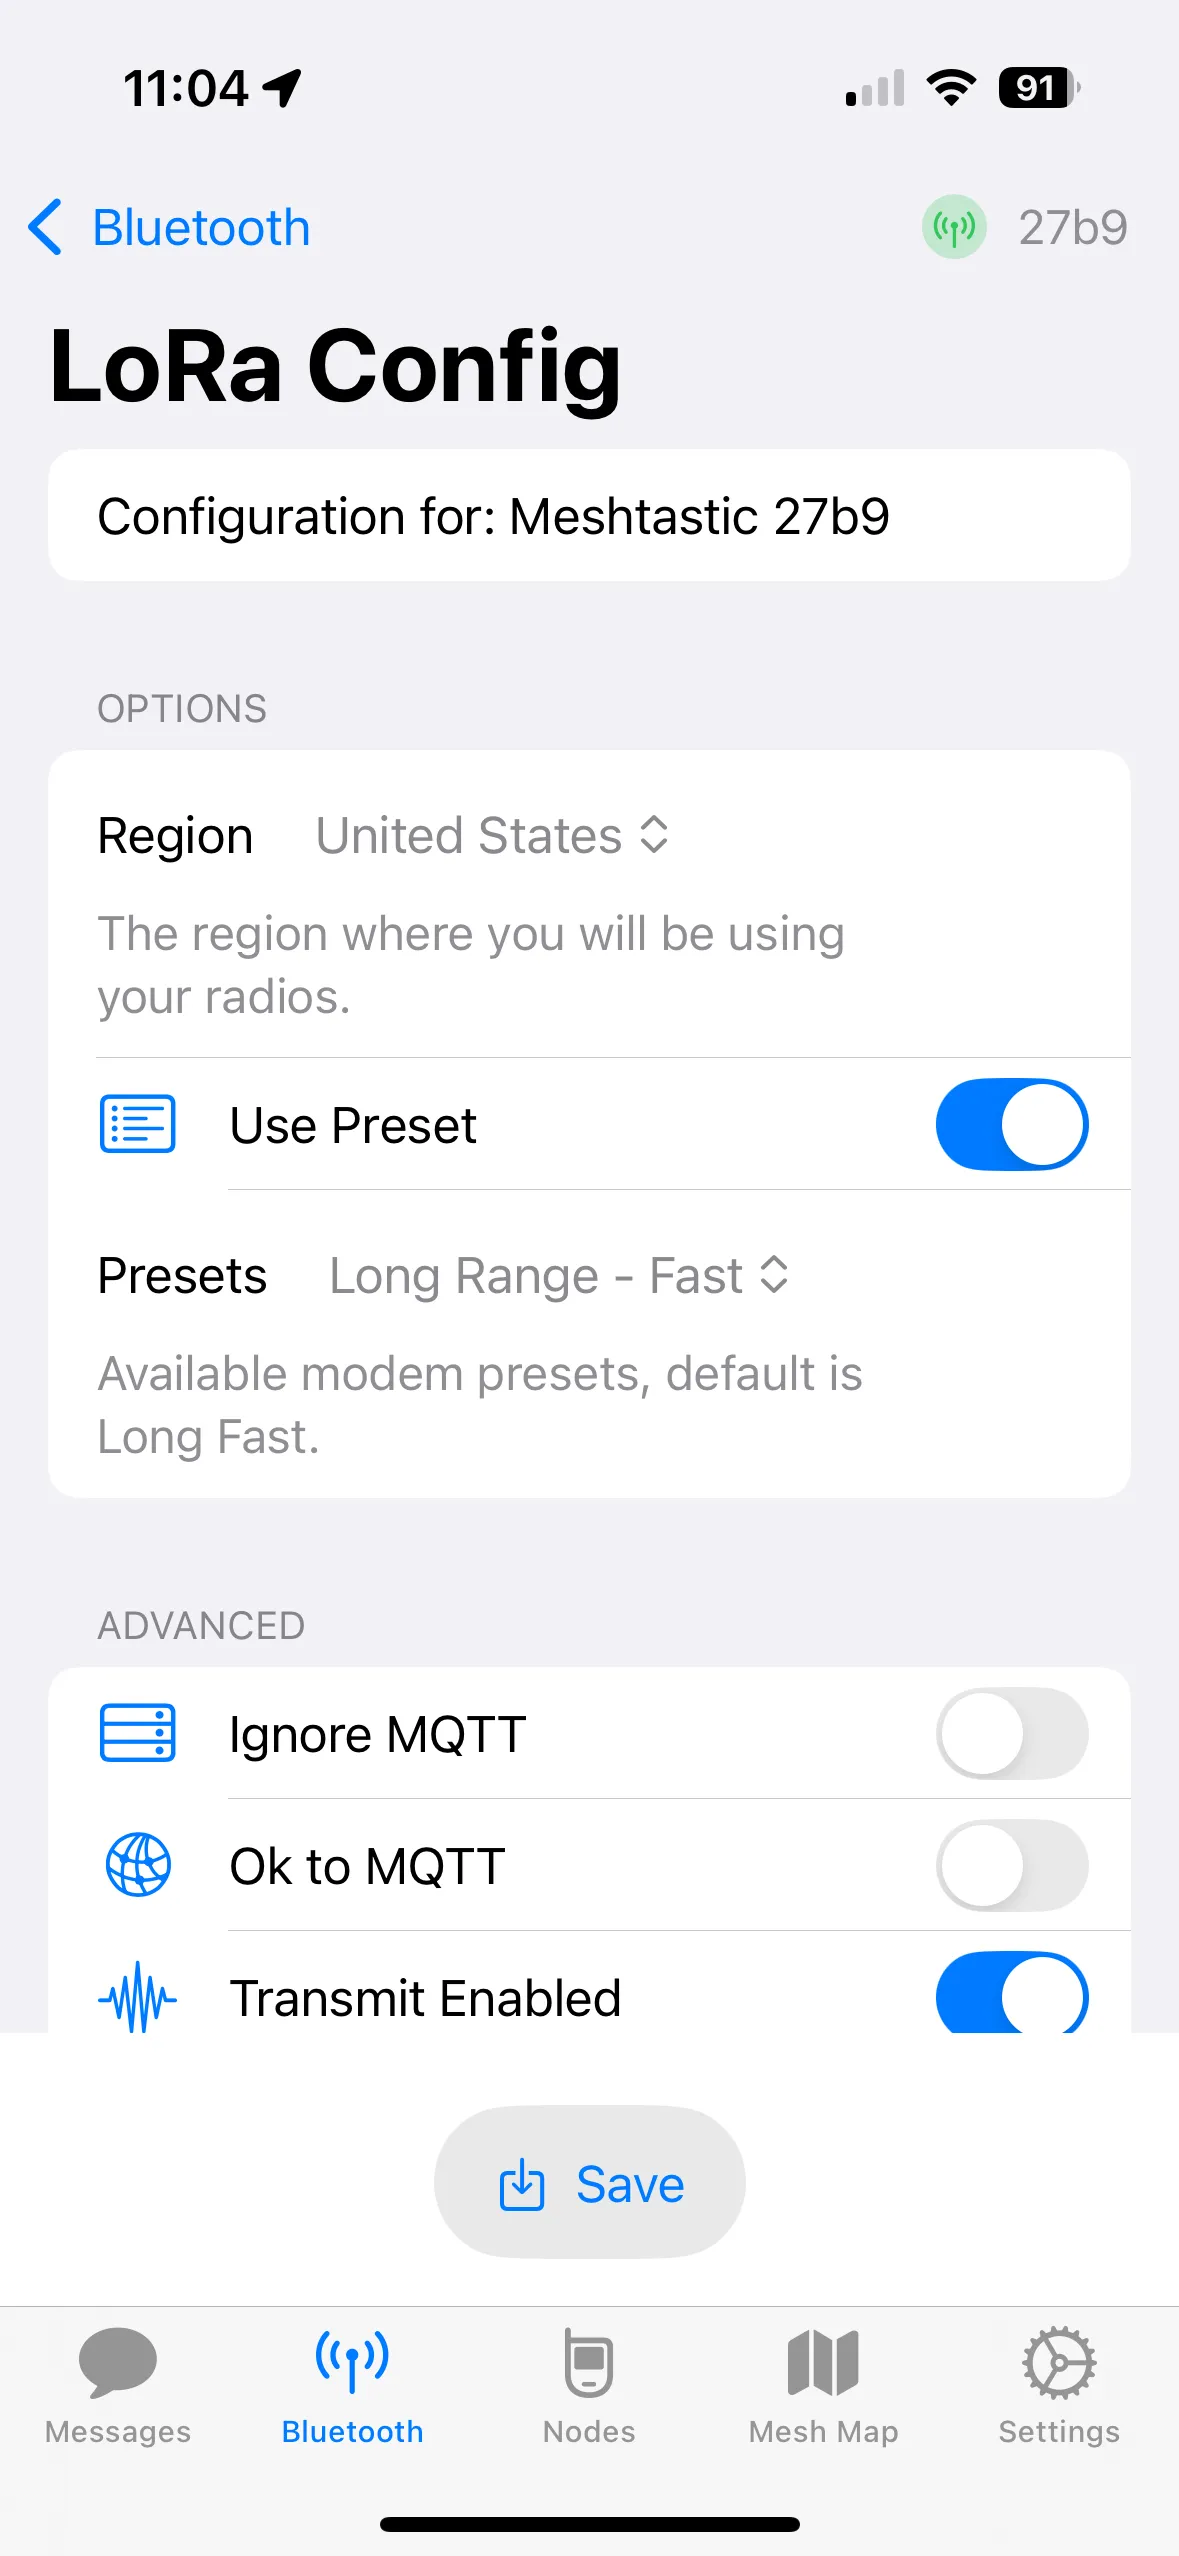
- Select “United States” for the region. Leave modem preset set to “Long Range - Fast” and click “Save”.
- The radio will now restart and it should try and connect automatically afterwards. If it doesn’t automatically connect after a minute or so, restart the Meshtastic app and re-select your radio to connect.
🎉 Your radio is now running! If there are other meshtastic radios in your area you’ll begin to see them in the Nodes tab of the app.
You’re ready to mount the radio outside in a sunny spot with the solar panel facing south. Or continue setup below to create a private channel first…
Be aware that these radios operate with line-of-sight so the range varies greatly depending on your surroundings (building, trees, etc) and terrain. So the higher up and clearer the area you can mount your radio, the better the range will be.
Private Channel Setup
Channels are saved onto the radio itself and by default the only channel you will have is the “Primary” public channel. This channel is used to send messages to all other nodes in your network.
This channel is good for passing on info generally but not so good for private messages you only want to share with specfic people.
Let’s now set up a new private channel on your radio that you could use for family communication, for example.
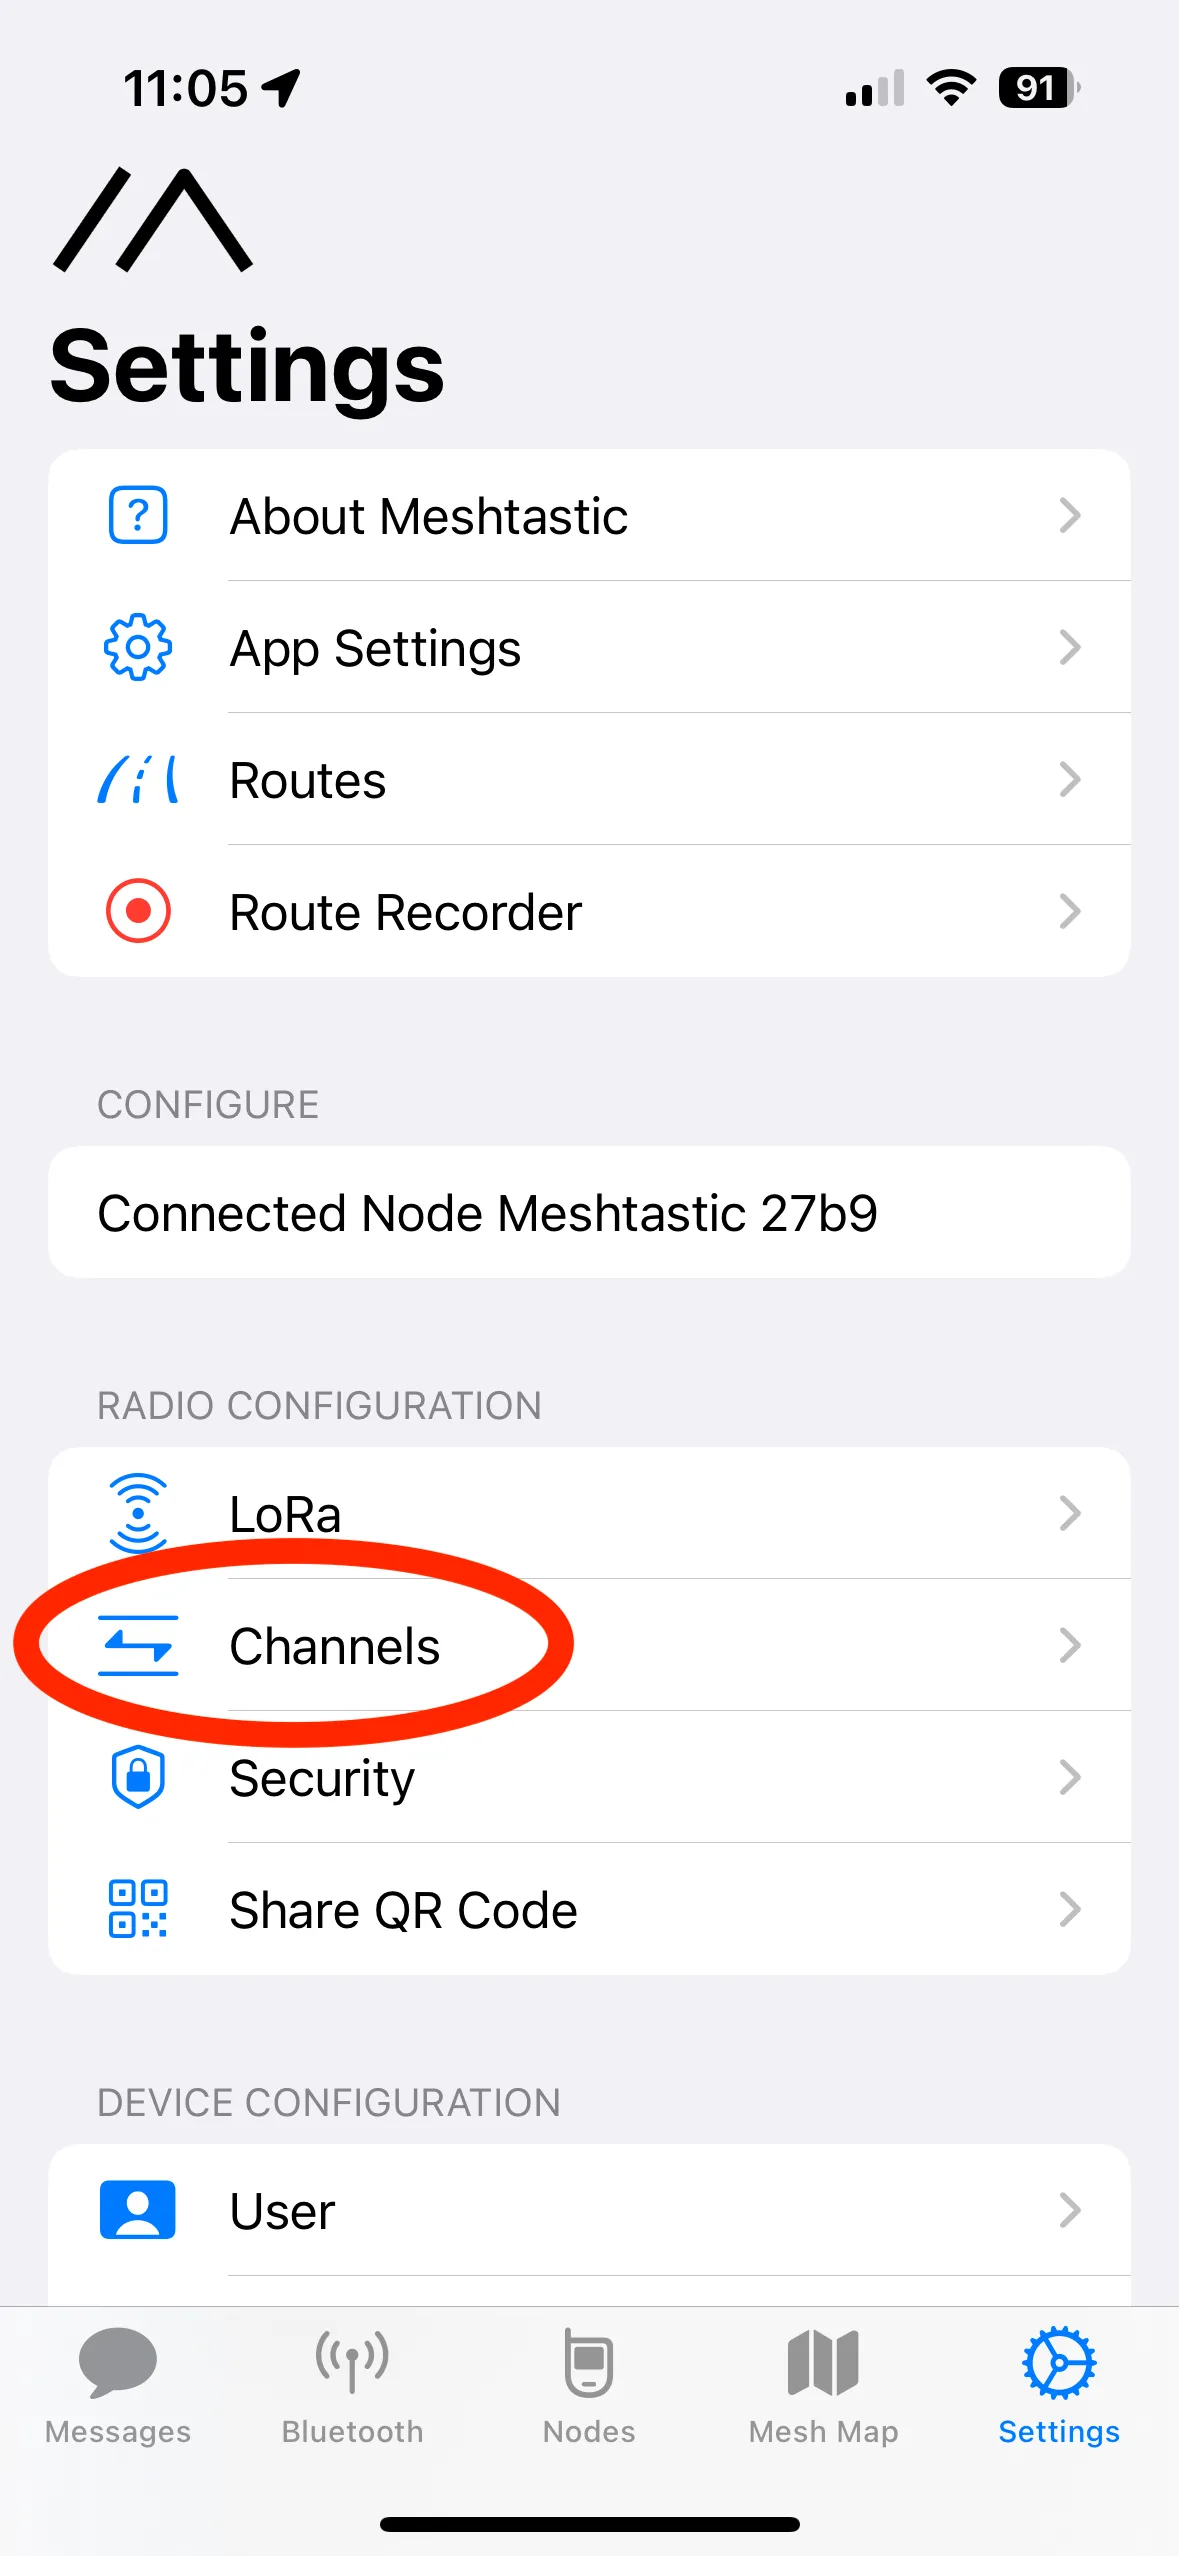
- Open up the Settings tab and tap on “Channels” under “Radio Configuration”
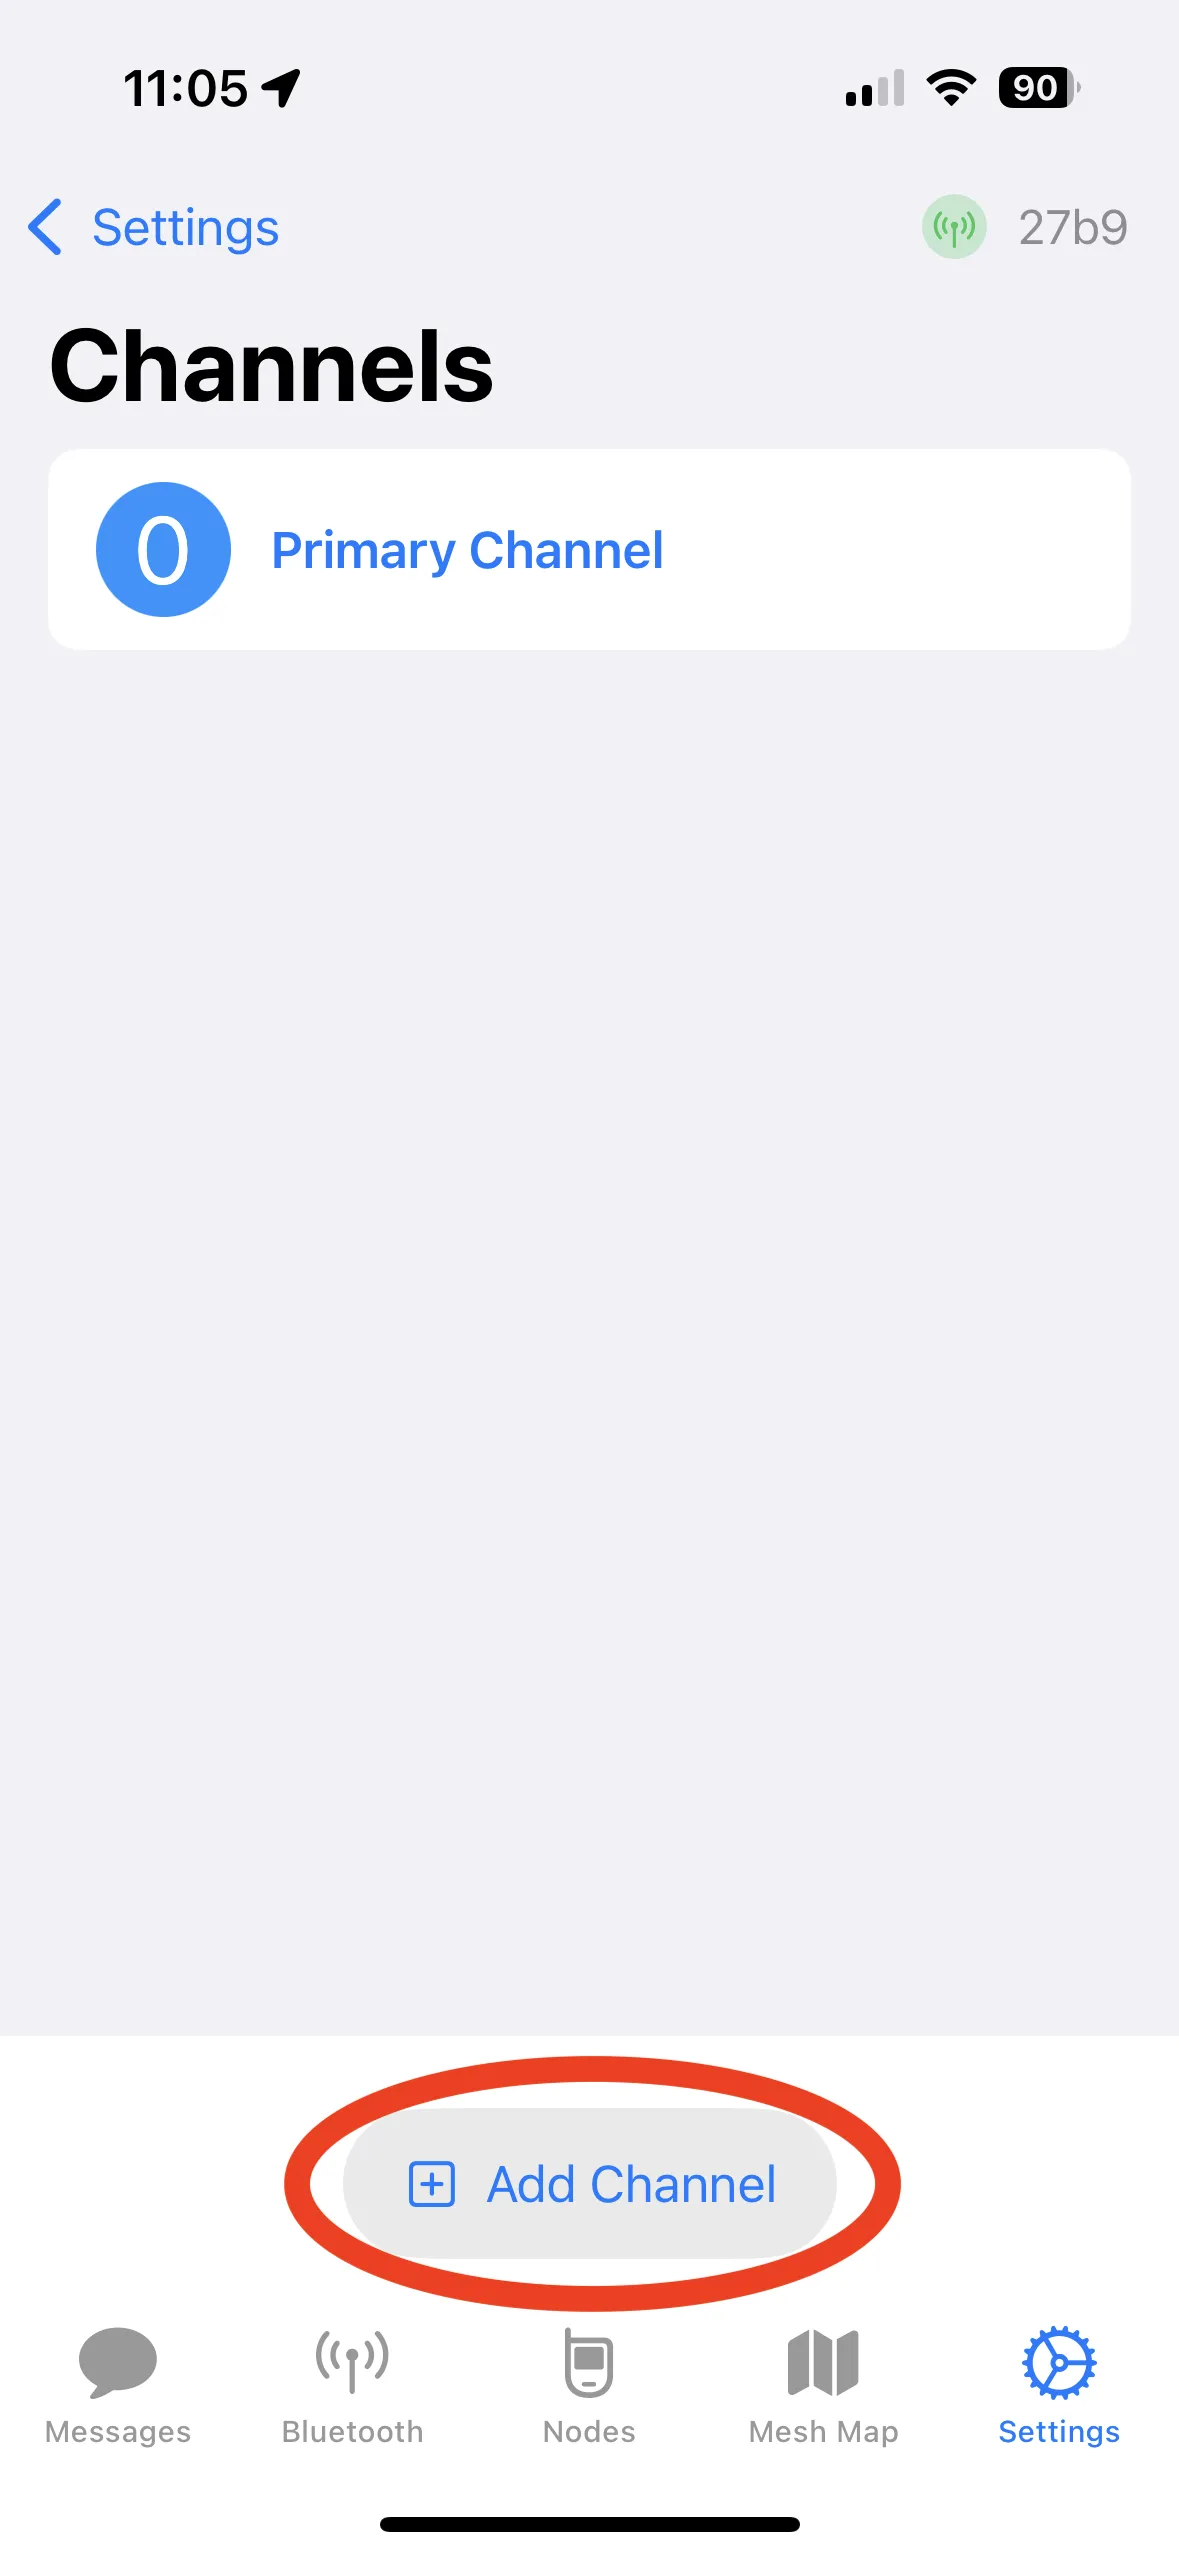
- Select “Add Channel”
-
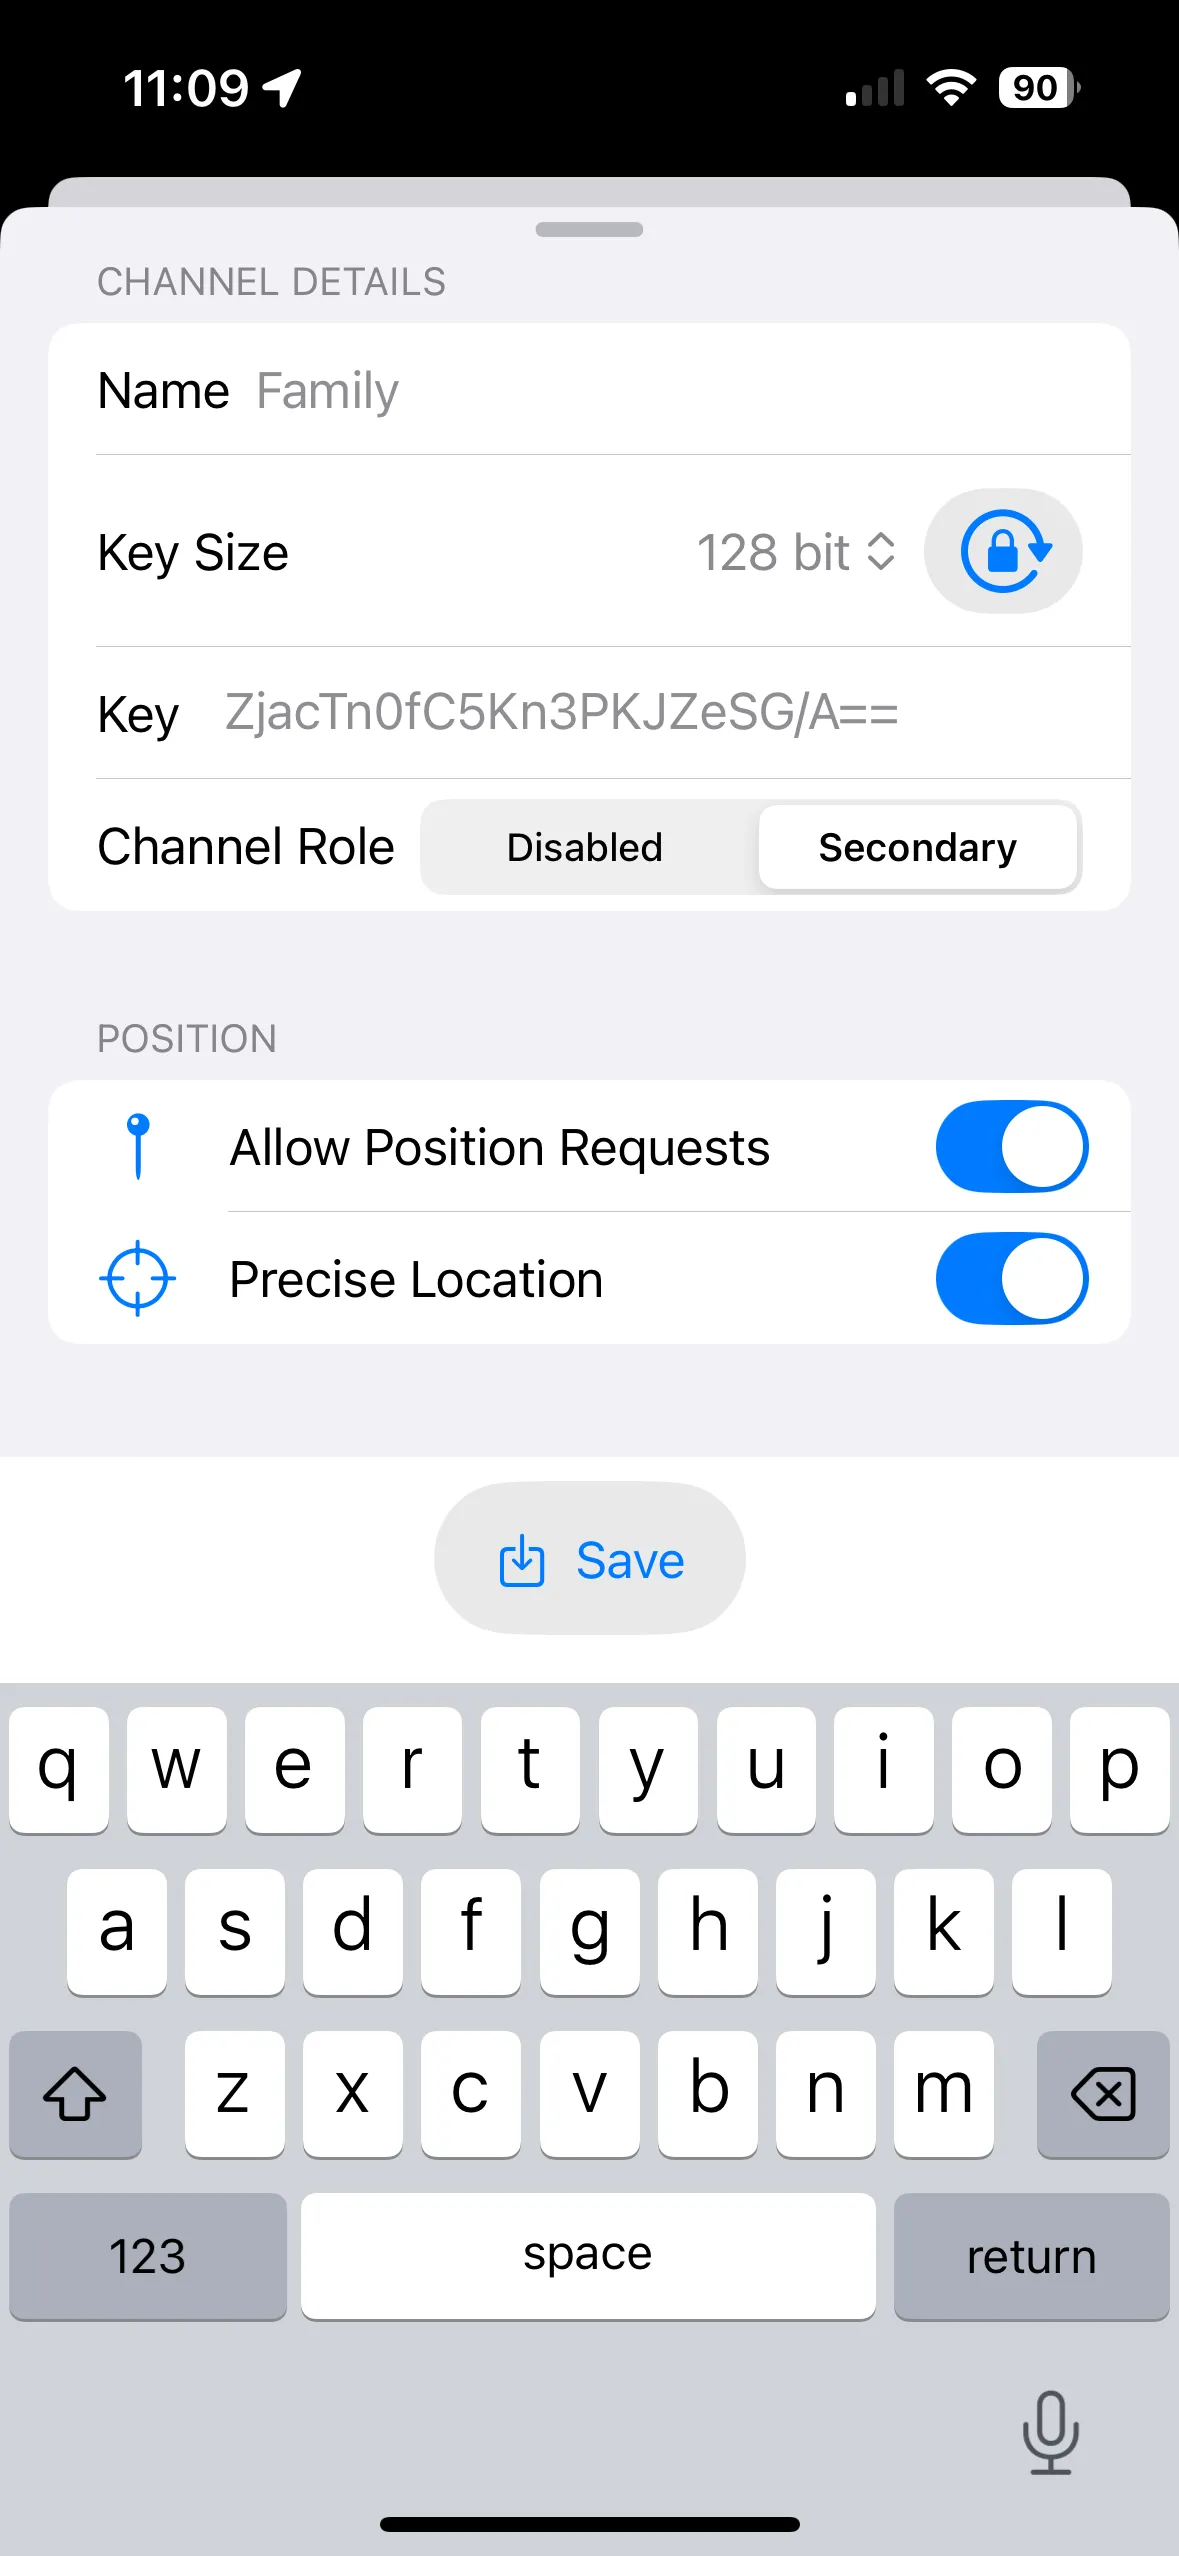
Add your private channel name. Leave key size at 128 bit, and the channel type as “secondary”. I also toggle on “allow position requests” and “precise location”.
-
Copy the auto-generated key to your notes. This key is what allows you to receive messages on that private channel. To add the private channel to other nodes you’ll need this key.
-
Click save.
- Jump back to the Messages tab and select Channels you should be able to see your new private channel.
If you do that same channel setup process on your other meshtastic nodes you’ll be able to communicate privately with your group.
Make sure to use the key you copied to your notes from set 4 on the subsequent nodes. Just paste it into the key field on the “Add Channel” config screen instead of using the auto-generated one.
The private channel name doesn’t need to match between nodes, but the key does.
🎉 You’re ready to go!
Check out the Meshtastic docs to learn more: https://meshtastic.org/docs/introduction